How To Build CI/CD Pipeline: A Simple Guide

Cloud-native applications have made development faster, more scalable, and more modular. But managing these distributed systems also introduces complexity. That’s where CI/CD pipelines come in. They allow teams to automate repetitive steps like code building, testing, and deployment.
In this guide, we’ll show you how to build a CI CD pipeline . You’ll learn what a pipeline is, the difference between scripted and declarative syntaxes, and how to automate Docker image deployment.
What is a CI/CD Pipeline?
A CI/CD (Continuous Integration/Continuous Deployment) pipeline automates the entire software delivery process. When you push code, the pipeline kicks in: it builds the app, runs tests, and deploys to a staging or production environment.
The main benefits of CI/CD pipelines include:
- Consistent and automated testing
- Faster time to production
- Reduced manual errors
- Easier rollbacks and debugging
To build a CI CD pipeline effectively, you need a CI/CD tool that lets you define your process in a structured, repeatable way—preferably as code.
Choosing Between Scripted and Declarative Pipelines
Before setting up a pipeline, you need to decide between two pipeline syntaxes: Scripted and Declarative. Both are used to define what steps should happen and in what order, but they differ in complexity and structure.
Scripted CI/CD Pipeline
The scripted syntax is based on Groovy and is less restrictive. It allows you to write logic directly in the pipeline script, which gives more flexibility. But with that freedom comes complexity—scripts can become hard to read and maintain over time, especially in large projects.
Use scripted pipelines if your automation process is complex and needs full programmatic control.
Declarative CI/CD Pipelines
For the pipeline process to work, each component/microservice should have a file named microtica.yaml on the root level in its source code. This file contains the specification of the build process.
During the build process, Microtica extracts the specification from the code. Then, it creates a state machine to drive the defined process.
In order to ensure a single source of truth for pipeline specification, Microtica does NOT allow changes in the Build pipelines from the UI. Changes will only take effect from the YAML file provided in each source code repository. We find this very helpful in avoiding possible confusion of definition, maintenance, and, most importantly, debugging problems in the process.
Extending the Pipeline: Build and Push a Docker Image
To take things further, let’s add Docker image creation and pushing to the CI/CD process. This pipeline builds and tests your code, creates a Docker image, and pushes it to Amazon ECR.
Pipeline:
 StartAt: Build
 States:    Build:
 Type: Task
    Resource: microtica.actions.cmd
    Parameters:
    	environmentVariables:
        pipelineId: "$.pipeline.id"
        version: "$.commit.version"
       commands:
       - echo Starting build procedure...
       - npm install
       - npm test

 	echo Logging in to Amazon ECR...
	 - $(aws ecr get-login --region $AWS_REGION --no-include-email)

 	- echo Checking if repository exists in ECR. If not, create one
 	- repoExists=`aws ecr describe-repositories --query "repositories[?repositoryName=='$pipelineId']" --output text`
	 - if [ -z "$repoExists" ]; then aws ecr create-repository --repository-name $pipelineId; fi

     - awsAccountId=$(echo $CODEBUILD_BUILD_ARN | cut -d':' -f 5)
 	- artifactLocation=$awsAccountId.dkr.ecr.$AWS_REGION.amazonaws.com/$pipelineId

    - echo Build Docker image...
 	- docker build -t $pipelineId .
	- docker tag $pipelineId $artifactLocation:$version
	- docker tag $pipelineId $artifactLocation:latest

 	- echo Push Docker image
 	- docker push $artifactLocation
 	sourceLocation: "$.source.location"
 	artifacts: false
 End: true
This configuration uses environment variables and bash commands to automate Docker tasks. After a successful build and test, the image is tagged and pushed to ECR.
How to Build a CI/CD Pipeline with Microtica
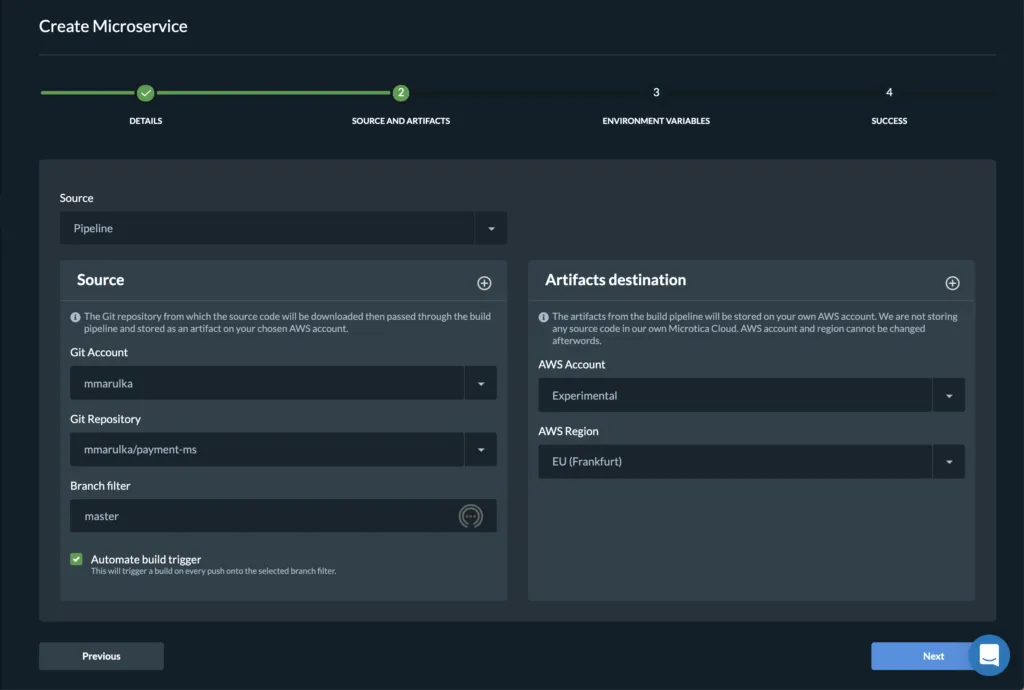
To build a CI CD pipeline in Microtica, start by creating a Git repository for your project. Add a microtica.yaml file to define the pipeline logic. Once your project is connected to Microtica, use the portal’s wizard to create a component and set up automatic build triggers. Microtica adds a webhook to your repo, so every time you push new code, the build starts automatically.
Building the docker image gave us an artifact so we can deploy it in a Kubernetes cluster. You can do this from Microservice details — Add to Cluster, or in the Kubernetes Dashboard — Microservices — Deploy.
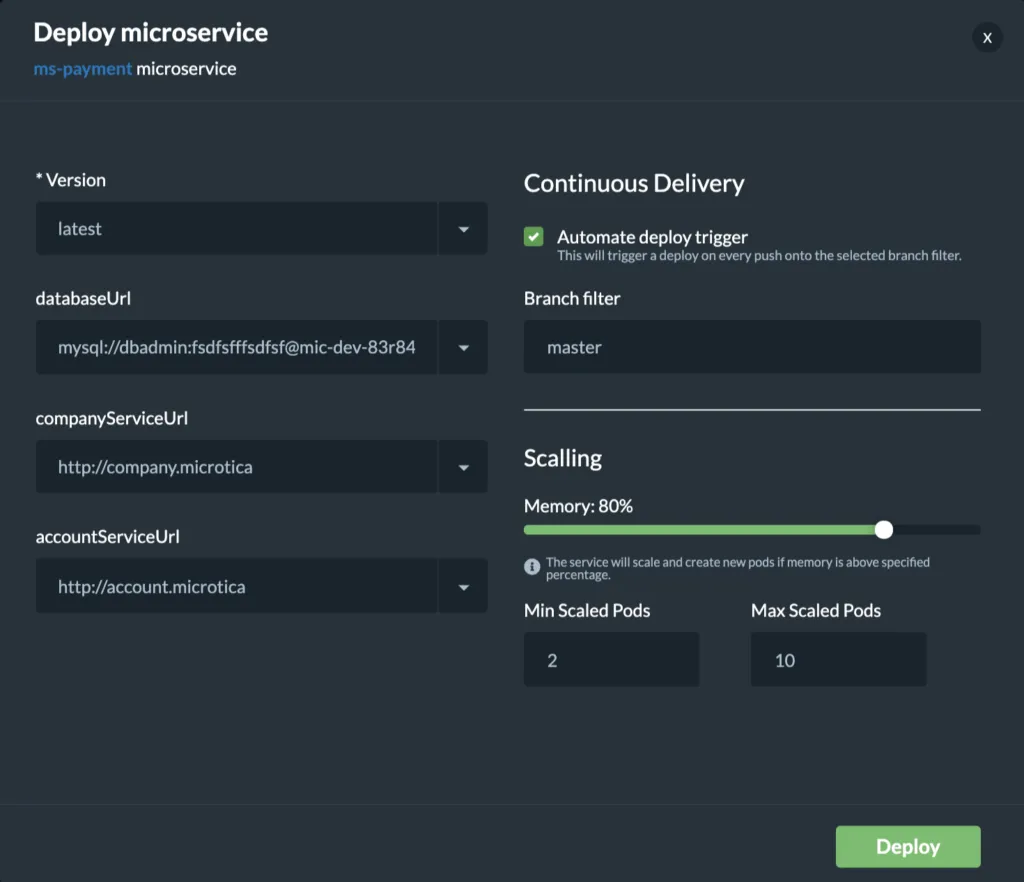
When you deploy your microservice in a Kubernetes Cluster you can select the scaling options. Moreover, you can also set up continuous delivery for your microservice.
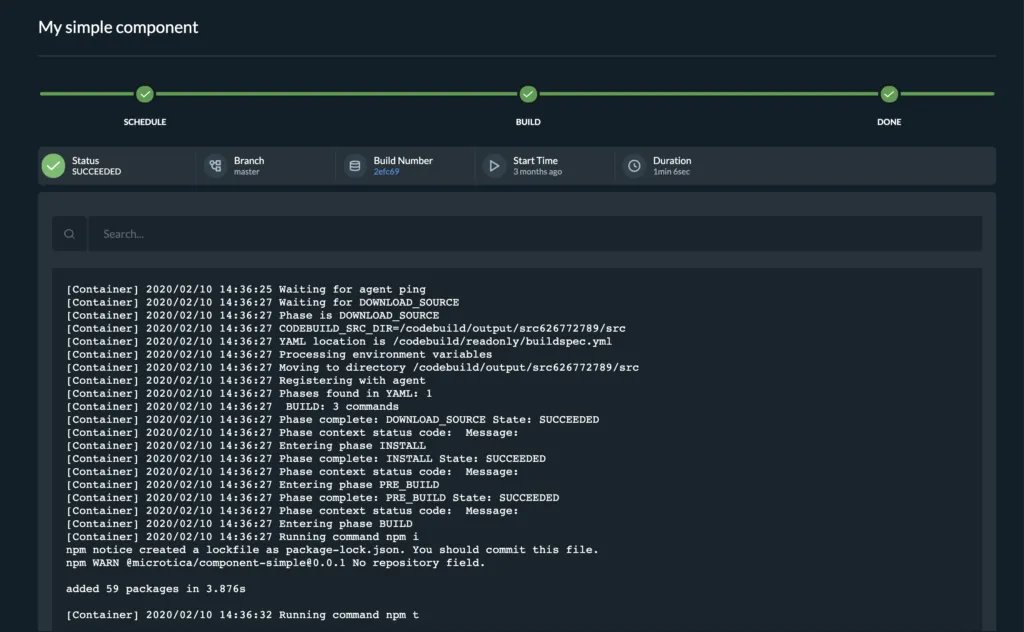
Monitor Pipeline Logs and Status
Every time your pipeline runs—either manually or via webhook—you can follow its progress in the Microtica portal. Real-time logs show each command and its output. If something fails, you’ll see a red error marker and can inspect the logs to debug the issue quickly.
Following CI/CD best practices, it’s important to monitor every build, catch failures early, and keep logs accessible for all developers on the team. Microtica makes this easy by providing centralized access to build history and logs through the Pipelines Overview page.
You can check build health, review past logs, and rerun any build from the interface when needed. It’s good practice to regularly review these logs and use them to improve pipeline reliability over time.
Microtica also flags unhealthy pipelines that repeatedly fail, allowing teams to take quick corrective action. This aligns with best practices such as failing fast, fixing broken pipelines immediately, and avoiding manual patchwork that hides underlying issues.
Conclusion
If you want faster releases and fewer deployment headaches, it’s time to build a CI CD pipeline. Using tools like Microtica and the declarative syntax, you can automate the entire process—from code commit to Docker image deployment.
You’ll spend less time on manual tasks and more time improving your software. So start by writing a microtica.yaml file and connect your repository. Once you see how smoothly it works, you’ll wonder why you didn’t build a CI CD pipeline sooner.
Subscribe to receive the latest blog posts to your inbox every week.
*By subscribing you agree to with our Privacy Policy.

Relevant Posts