Deploy a Microservice with Kubernetes on AWS

Kubernetes is the most popular open-source platform for managing containerized workloads and services. Kubernetes abstracts the underlying infrastructure layer so that developers can focus on building applications.
In this article, we will go through a simple Kubernetes deployment example. Following it, you will create a Kubernetes Cluster using a pre-made infrastructure template and deploy a service on Kubernetes.
For an inside look into our platform, check out our video here:
https://www.youtube.com/watch?v=Dgyy92NXMeE
1. Create an account
Creating a Microtica account is totally free. You can do it by signing up with your email or with your Git account.
2. Create a new environment
In the sidebar, select Environments, then Create Environment and enter a name for the environment (e.g., Kubernetes Demo). From the templates, select the Kubernetes Template, which will provision an Elastic Kubernetes cluster, and click on Create From Template.
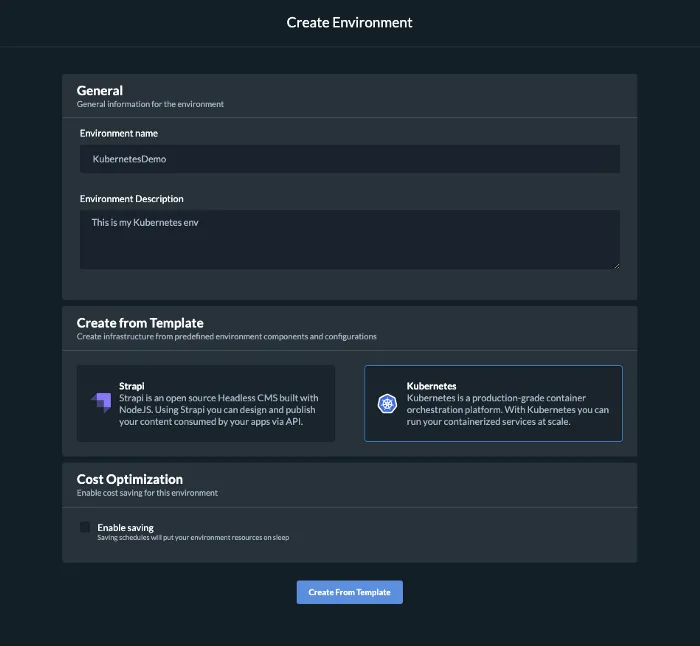
This action creates two components in the new environment:
- a VPC component to set up the networking where the EKS container will run,
- and the Kubernetes Cluster Component, which contains EC2 instances, Load balancer, and preinstalled Ambassador API Gateway.
3. Configure the infrastructure
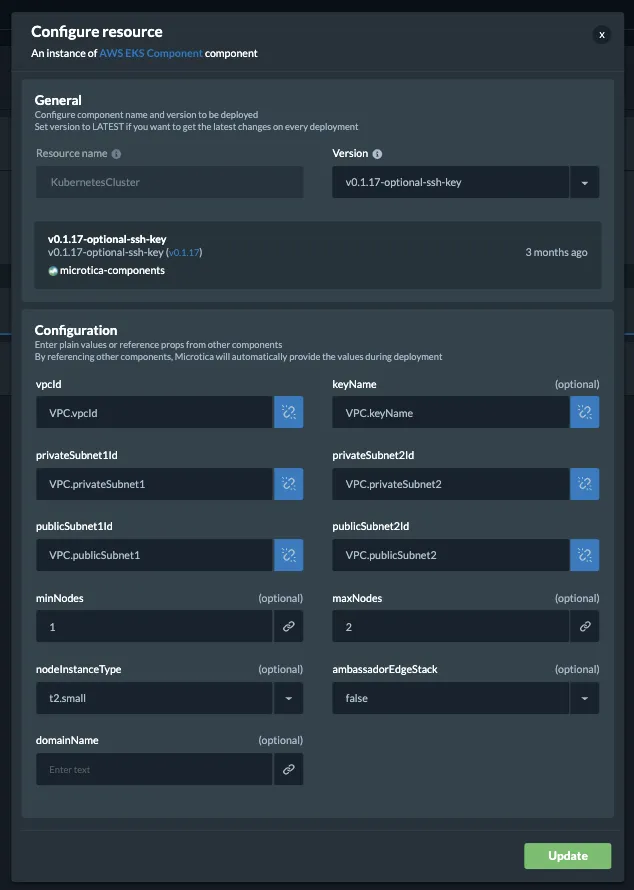
As you can see, when configuring the parameters for the Kubernetes Cluster component, there are references to the VPC component, so you don’t have to enter the values manually. This makes the configuration process less error-prone, and the chance for some security misconfigurations is reduced significantly.
The Kubernetes Cluster is preconfigured with minimal nodes and instance size options, but you can update this according to your needs.
4. Deploy the environment
Once you’re done with the infrastructure configuration, you can go ahead and trigger a deployment of the environment by clicking on Quick Deploy. For this to finish successfully, you’ll need to enter a designated AWS account. Here is how you can connect an AWS Account.
Note: All resources will be created on the provided AWS account, expenses will be calculated according to AWS pricing for using the services.
After you’re done, click on Quick Deploy again and select your target AWS account, where the infrastructure should be deployed.
It takes about 10 minutes for this cluster to be deployed on the cloud. In the meantime, you can follow the detailed deployment logs.
5. Define a service
After the deployment is finished successfully, you can find the Access URL of the cluster by navigating to environment details and expanding the KubernetesCluster component. You’ll get a 404 response when you open this URL because there is no service deployed there yet.
To deploy a service on the cluster, let go through a simple Kubernetes deployment example — a Hello World service. You can find the service code in this GitHub repository. The service contains:
- a Dockerfile,
- an index.js file that is an express app that returns Pong on a request,
- and the microtica.yaml file, which includes the pipeline steps that should be executed in Microtica.
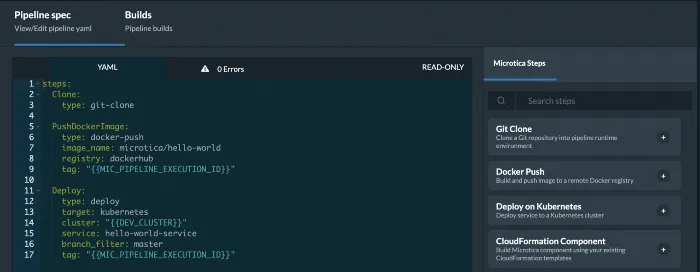
There are only two steps in the microtica.yaml file: Clone and Push Docker image. In the PushDockerImage step, you will build and push the image to your remote Docker registry. So here, you should define the name of the Docker registry we will connect in the next step. Make sure the name match. In this example, we use the name: dockerhub.
Here you should also define the image name, which will be used in step 9. In this example, we use the image name: microtica/hello-world.
6. Add Docker registry
As a next step, you need to add this registry to the Microtica portal so that Microtica can identify with that registry when the image is pushed. This can be done in the Kubernetes menu, under Docker Registries → Add Docker Registry. Enter the name you defined in the microtica.yaml file (the example uses dockerhub). You also need to authenticate with a Docker username and password so that you can create this registry.
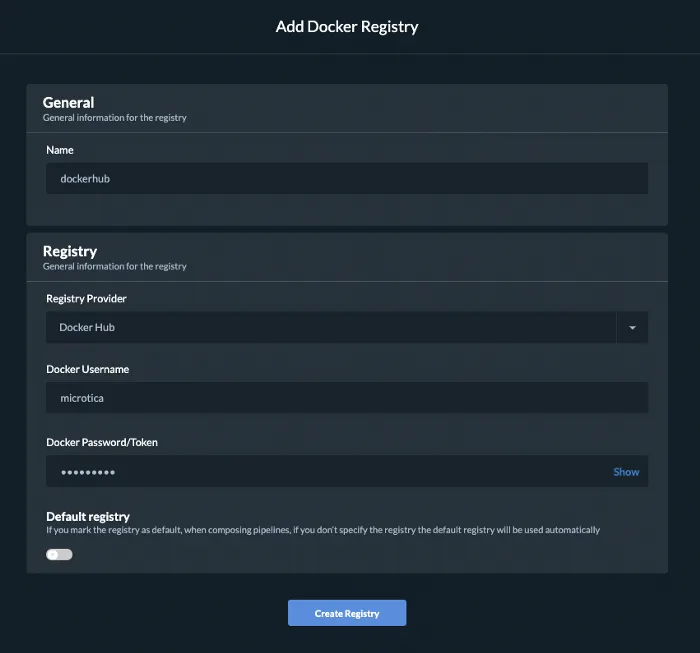
Here is a more detailed tutorial on how to connect Docker Registries.
7. Create a pipeline
To create a pipeline, you’ll first need to connect a Git account (GitHub, Bitbucket or GitLab). Go to Settings from the left menu, select the Git Accounts tab and click on Connect Account button. For the account type, choose GitHub or Bitbucket. You will be redirected to the provider’s authorization page. After successful authorization, you will be redirected to Microtica with the connected account enlisted.
Then go to Pipelines in the side menu, click on Create Pipeline. Give it a name (e.g., hello world app pipeline), then select the Git repository where you added the service code.
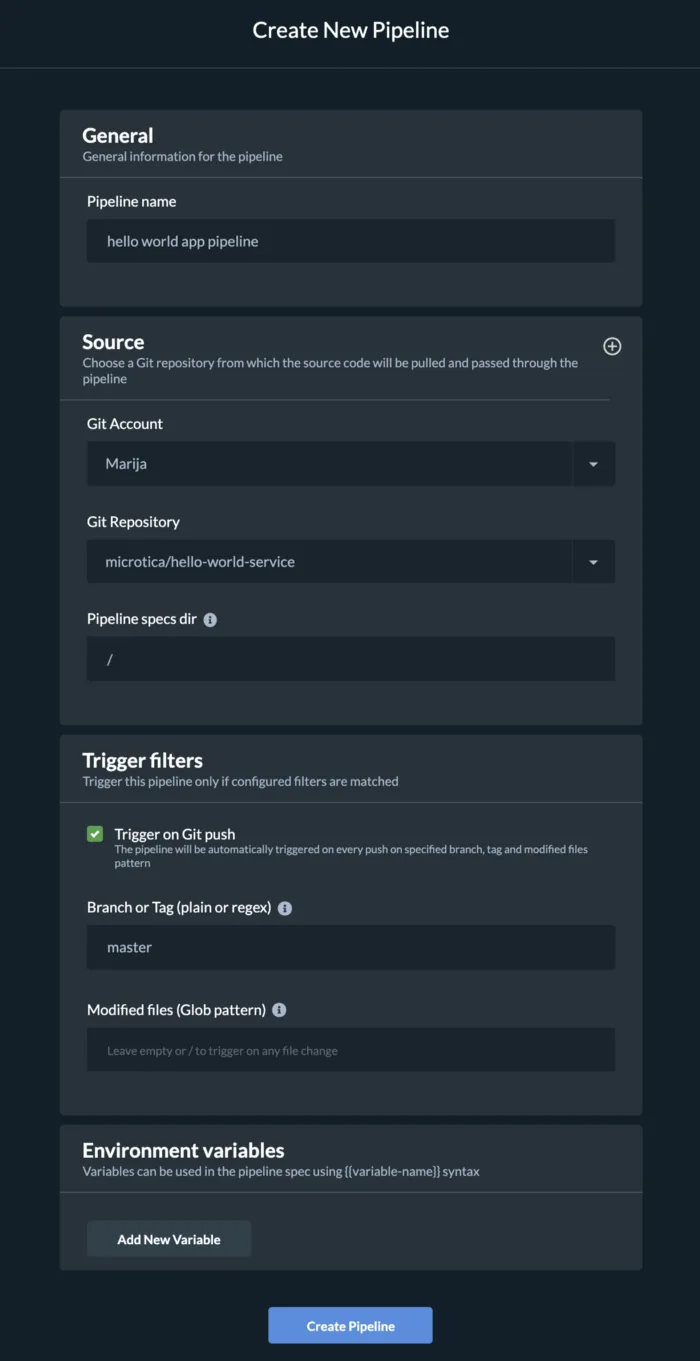
You can configure this pipeline to be triggered automatically on every Git push to a specified branch.
After creating the pipeline, you’ll be redirected to the Pipeline Editor, where the pipeline specification is available. This is the content of the microtica.yaml file, and it can be modified right from the UI editor.
8. Testing the pipeline
If you change something in the index.js file, like update the message, which should be the response, and then commit this change to the specified git branch, this will trigger an automated build of the service.
Looking in the Pipelines list, you should see the new build. Clicking on it, you will see the build’s details, along with the pipeline steps and logs for each of them.
This process will generate a Docker image which you’ll use to create a service and deploy it on the Kubernetes Cluster we previously created. When the pipeline is finished, it means the image is pushed.
Next, you need to register the service in Microtica.
9. Deploy the service
First, you need to create the service. Go to Kubernetes in the side menu, then Services and Create Service. Next, enter a name (e.g., hello-world-service), choose the dockerhub registry you defined in step 6, and select the docker repository with the name you specified in your microtica.yaml file (the example uses microtica/hello-world).
Next, go to the Kubernetes Cluster you created in step 3. On the right side, there is a menu that contains all the services created in the current project. Find the hello-world-service and click Deploy. A popup will come out showing scaling configurations you can apply to the service.
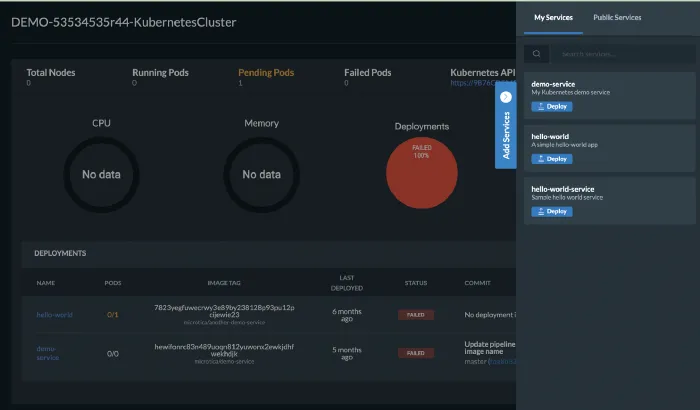
You can follow the deployment of the service in the Kubernetes Dashboard.
Once this is successfully deployed, you can access the service by using the Access URL/name of the service. (You can find the Access URL of the cluster by navigating to environment details and expanding the KubernetesCluster component.) You should see the response there.
10. Automated deployment
What you did now was a manual deployment of the service by registering it on the cluster. But in a typical DevOps process, deployments should be fully automated.
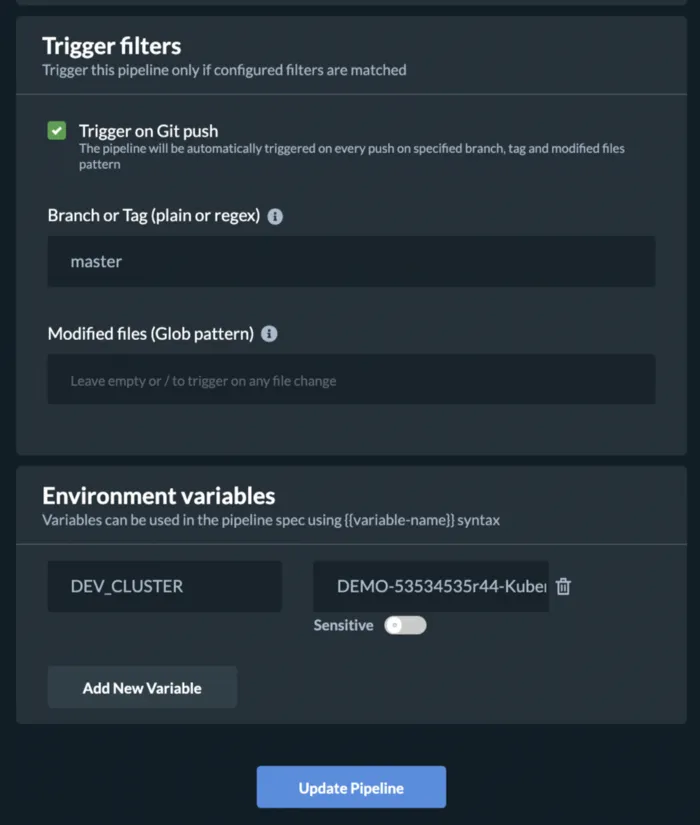
To achieve that, you can simply update the pipeline with another step which you can call Deploy. When configuring this step, you need to specify the cluster on which you want to deploy the service. This cluster will be defined as an environment variable (in this example, DEV_CLUSTER). You also need to specify the branch from which the automated deployment will be triggered.

To add an environment variable, you can Edit the pipeline and add a key-value pair for the cluster. The key we use in the example is DEV_CLUSTER, and the value is the cluster name.
After updating the pipeline, push these changes on the specified branch to trigger the deployment. The deployment should appear in the Pipelines list.
Navigating to the Kubernetes Dashboard, you can see that the new version of the service is being deployed. Clicking on the service brings you to the service details view, where you have insights about the deployment history. Here you can directly access the commit, which is currently deployed on the cloud.
AND YOU ARE DONE! YOU JUST DEPLOYED YOUR SERVICE ON A KUBERNETES CLUSTER AUTOMATICALLY!
11. Bonus: Cleanup
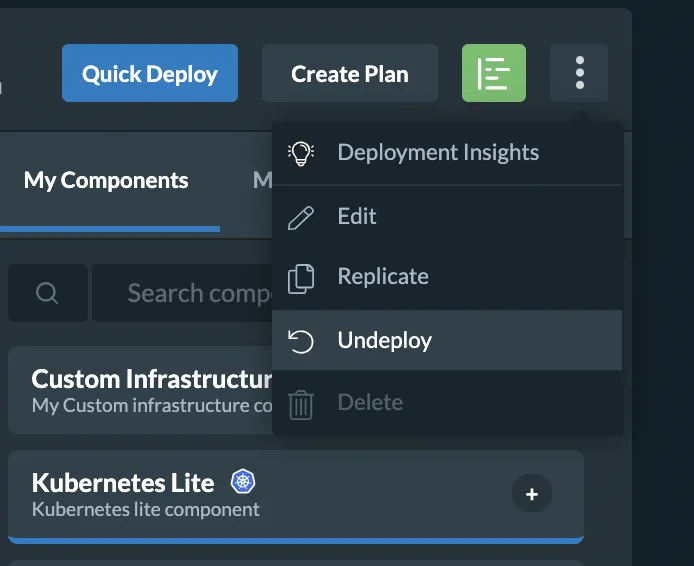
To remove all the resources created on your AWS account, go to Environments, click the environment details and in the menu, select Undeploy. This will clean up the resources created in AWS, but you will still have the configuration in Microtica in case you want to deploy it in the cloud again.
Subscribe to receive the latest blog posts to your inbox every week.
*By subscribing you agree to with our Privacy Policy.

Relevant Posts