A Guide on How to Deploy a React App on Kubernetes
.webp)
Deploying a React app can be as simple as pushing static files to a content delivery network. However, if you're building something dynamic, scalable, or for a growing team, you may need a more robust solution. That’s where Kubernetes comes in. It offers a powerful way to manage, scale, and automate deployments using containers. In this guide, we'll explain how to deploy a React app to AWS using Kubernetes, why this approach makes sense for production environments, and how tools like Microtica simplify the process.
Why Deploy React Apps on Kubernetes
If you're planning how to deploy a React app to AWS with long-term stability and scale in mind, Kubernetes offers benefits far beyond basic hosting.
Auto-scaling Capabilities
Kubernetes makes it easy to handle traffic spikes using horizontal pod autoscaling. Based on CPU, memory usage, or custom metrics, Kubernetes can automatically adjust the number of pods running your React app. This keeps performance consistent under varying loads without manual intervention or overprovisioning.
Canary and Blue-Green Deployments
Zero-downtime deployments are achievable with canary or blue-green strategies:
- Canary deployments roll out new features to a small set of users before full release.
- Blue-green deployments switch traffic between two separate environments, allowing safe rollbacks if needed.
These reduce deployment risks and increase confidence during fast-paced development.
Easy Rollback and Version Control
With Kubernetes, every rollout is versioned. If something goes wrong, you can roll back to a previous stable version with a single command, making continuous delivery safer.
A/B Testing
Testing different versions live is straightforward with Kubernetes:
- Deploy both app versions in separate pods.
- Route traffic between them using ingress controllers or service meshes.
- Measure performance, user behaviour, or conversion rates to choose the best option.
Common Ways to Deploy a React App
Several methods exist when deciding how to deploy a React app to AWS, depending on your needs, traffic, and infrastructure strategy.
AWS S3 + CloudFront
This cost-effective option works for client-side rendered apps:
- Build static files using npm run build.
- Upload them to an S3 bucket configured for website hosting.
- Distribute via CloudFront as a global CDN.
It’s fast and simple but doesn’t support advanced strategies like blue-green rollouts or container orchestration.
Docker Containers
Packaging your React app as a Docker container standardises deployment:
- Build an image with your app and a web server like Nginx.
- Push it to a container registry.
- Deploy on any Docker-compatible host.
This approach improves portability and runtime control, preparing your app for scalable deployments.
Kubernetes for Advanced Use Cases
For production environments that need high availability and seamless rollouts:
- Deploy your Dockerised React app into Kubernetes pods.
- Use deployment strategies like rolling updates or blue-green deployments.
- Integrate monitoring, scaling, and CI/CD workflows.
Though complex, this is often the answer when deploying a React app to AWS for large-scale, production-grade systems.
Step-by-Step: How to Deploy React App on Kubernetes Using Microtica
To deploy React on AWS, you need the following templates:
This will setup a production-ready solution in less than 20 minutes. Click Deploy with Microtica below and follow the template steps to deploy your ReactJS application on your AWS account. First, you need to create a Microtica account by signing up with your email or your Git account. If you want to be able to deploy a React app, you must have an AWS account. If you do not have one, you should sign up for an AWS account.

1. Create Git Repository
Sign up for a Microtica account using email or your Git provider (GitHub, GitLab, Bitbucket, or CodeCommit). Locate the ReactJS template and click Deploy app. Connect your Git account to create a repository for your React app code.
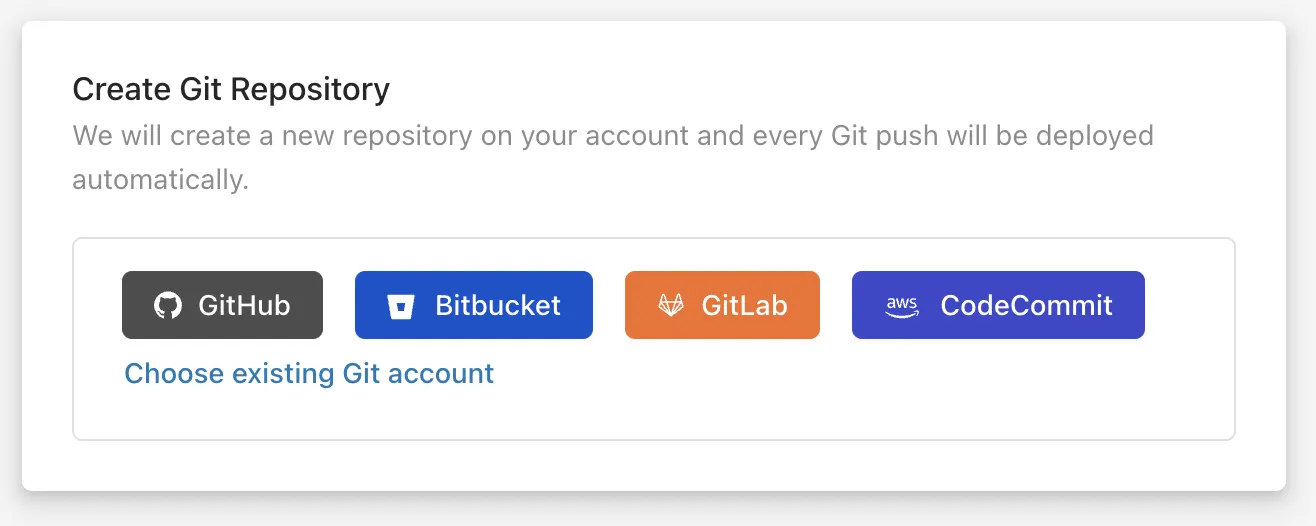
If you already have existing ReactJS code, import it into Microtica instead of starting from the template.
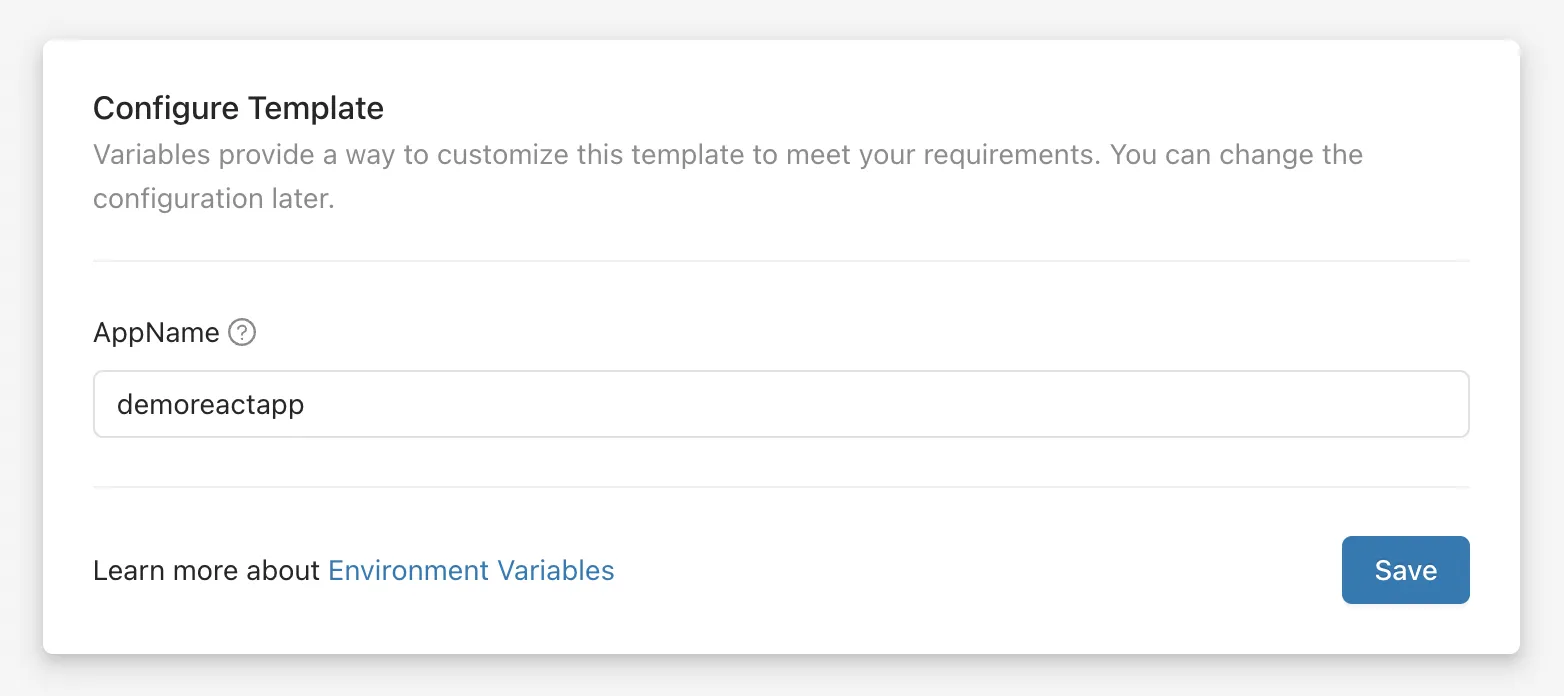
2. Customize the Template
Give your app a name in Microtica for easy identification. Adjust environment variables as needed; these can be updated later in App Settings.
3. Create an EKS cluster
To deploy on AWS, create an Amazon EKS cluster:
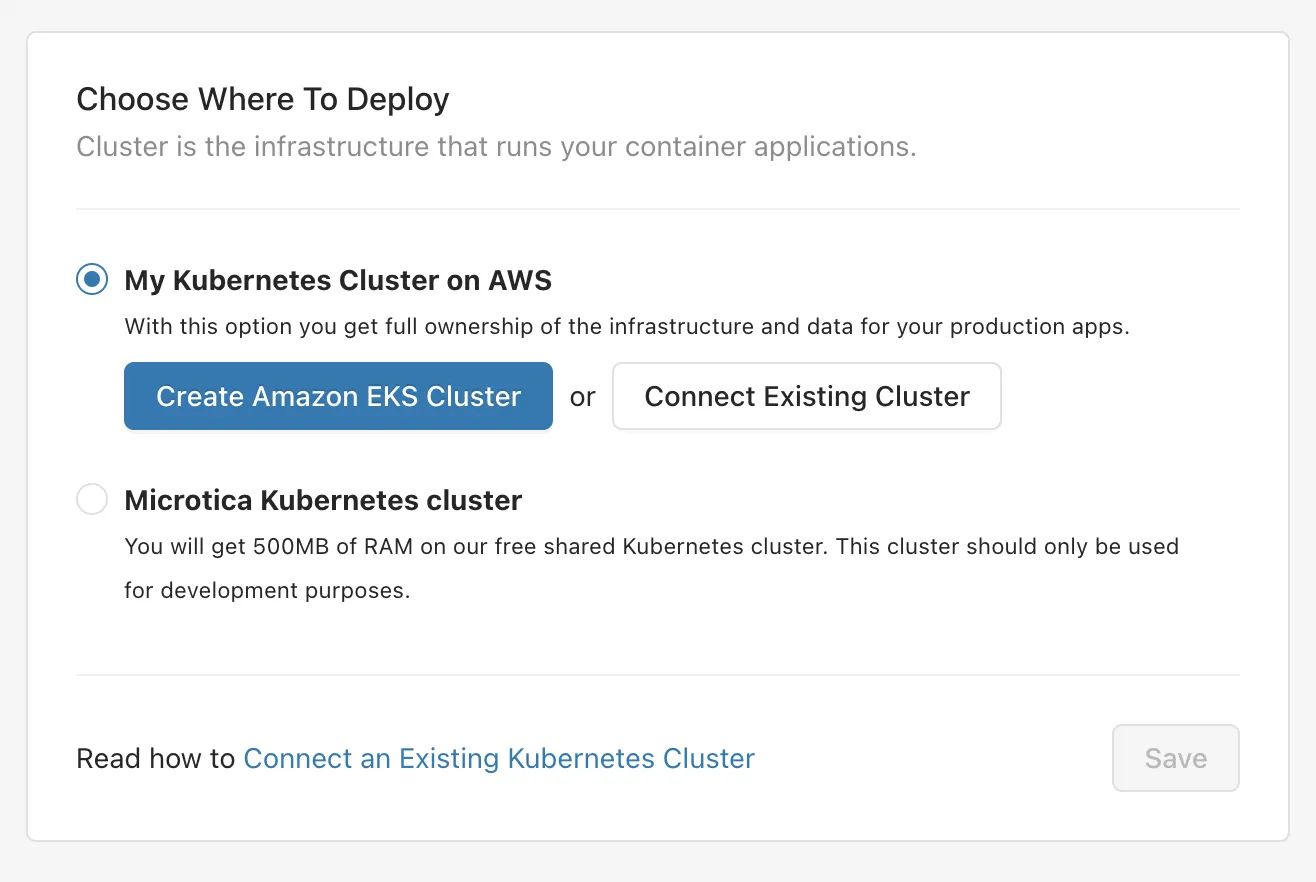
- Click Create Amazon EKS Cluster.
- Select your environment or create a new one.
- Connect your AWS account by initiating a CloudFormation stack, granting Microtica permissions to provision infrastructure.
- Choose your AWS region and continue.
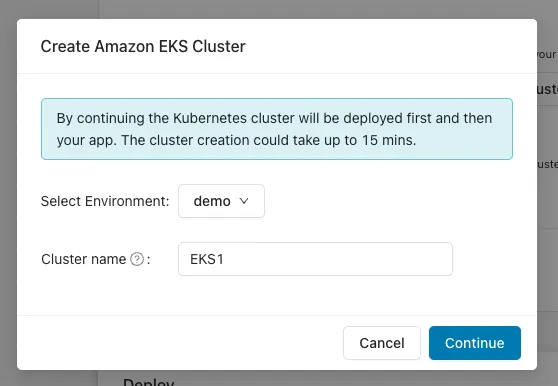
Deploying on AWS gives full ownership of your cloud infrastructure and apps.
4. Deploying the ReactJS app to Kubernetes
Review the deployment summary, then click Deploy. Microtica will:
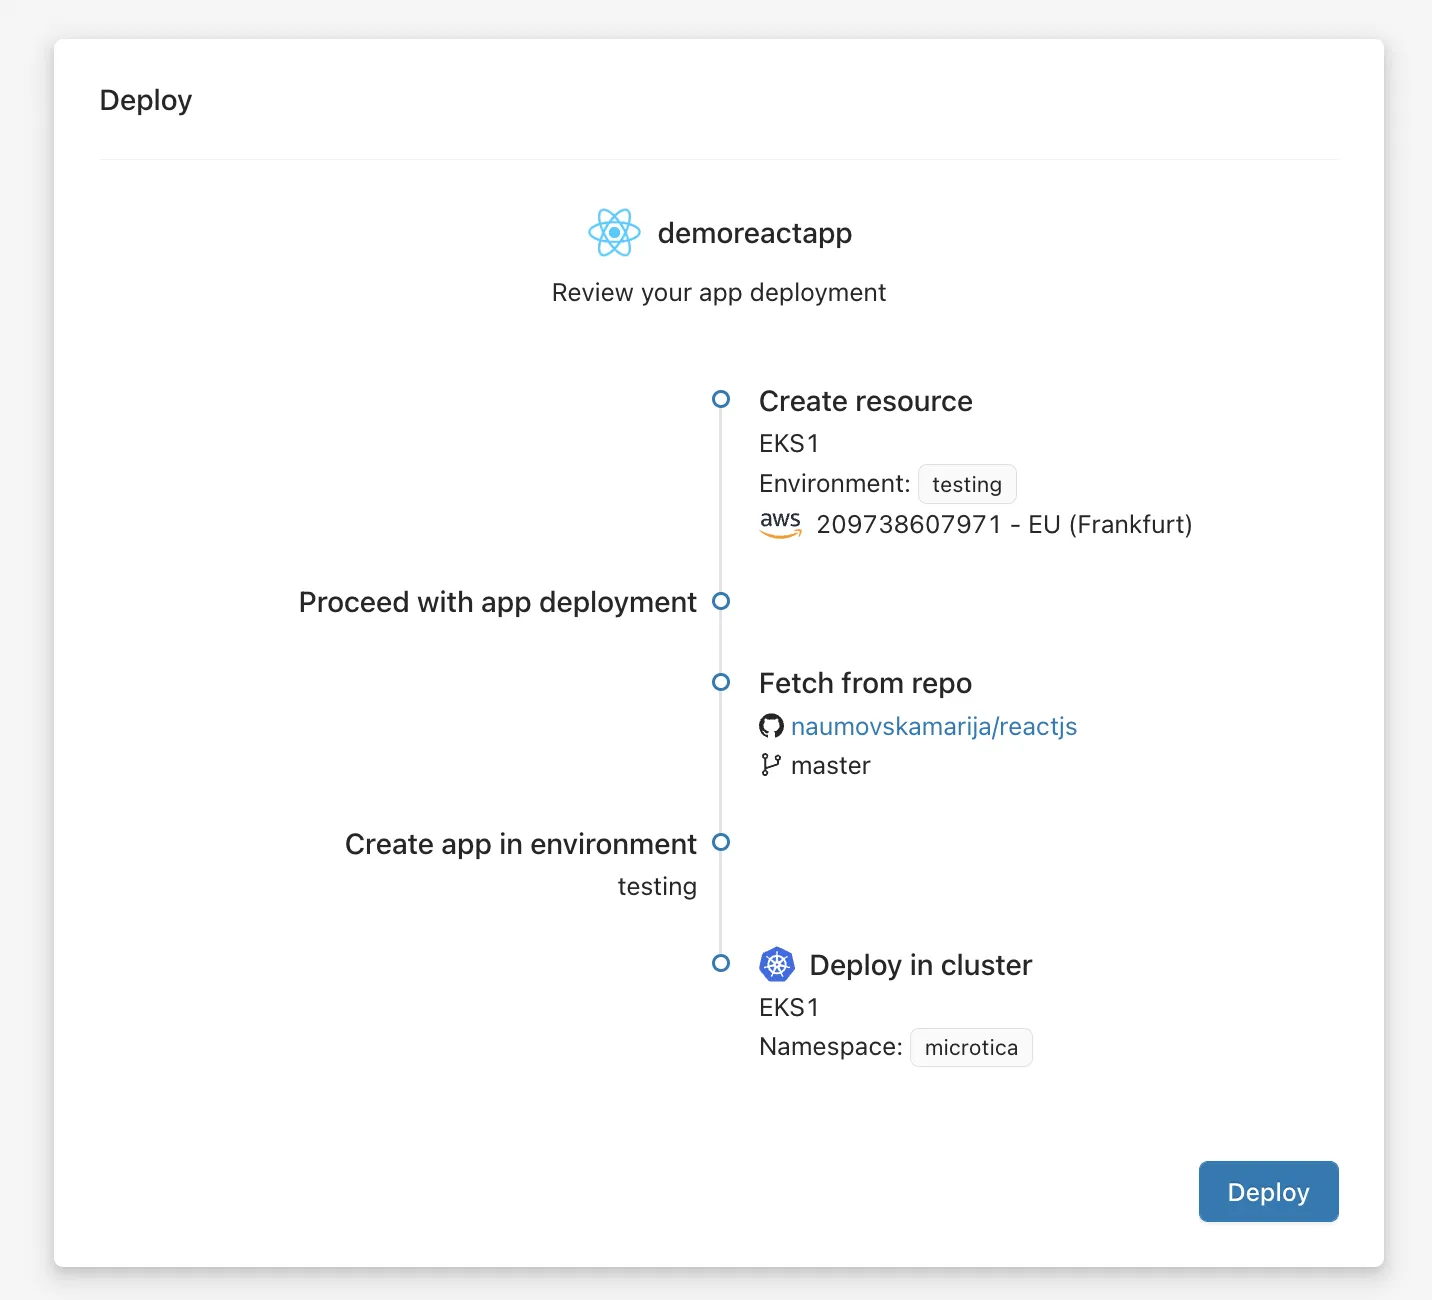
- Provision the EKS cluster on your AWS account.
- Deploy the React app to the new cluster.
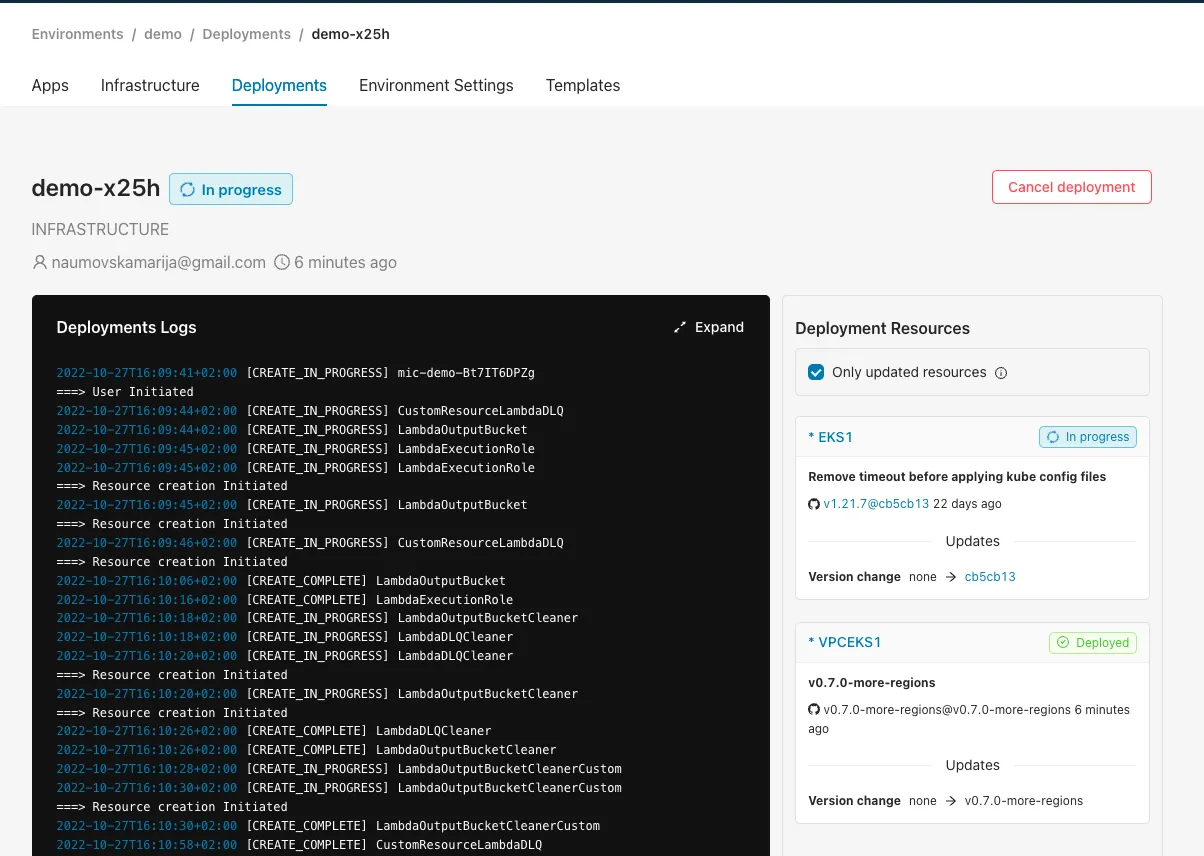
When the deployment of a new EKS cluster is finished, click the View logs button to follow the deployment process of the React app.
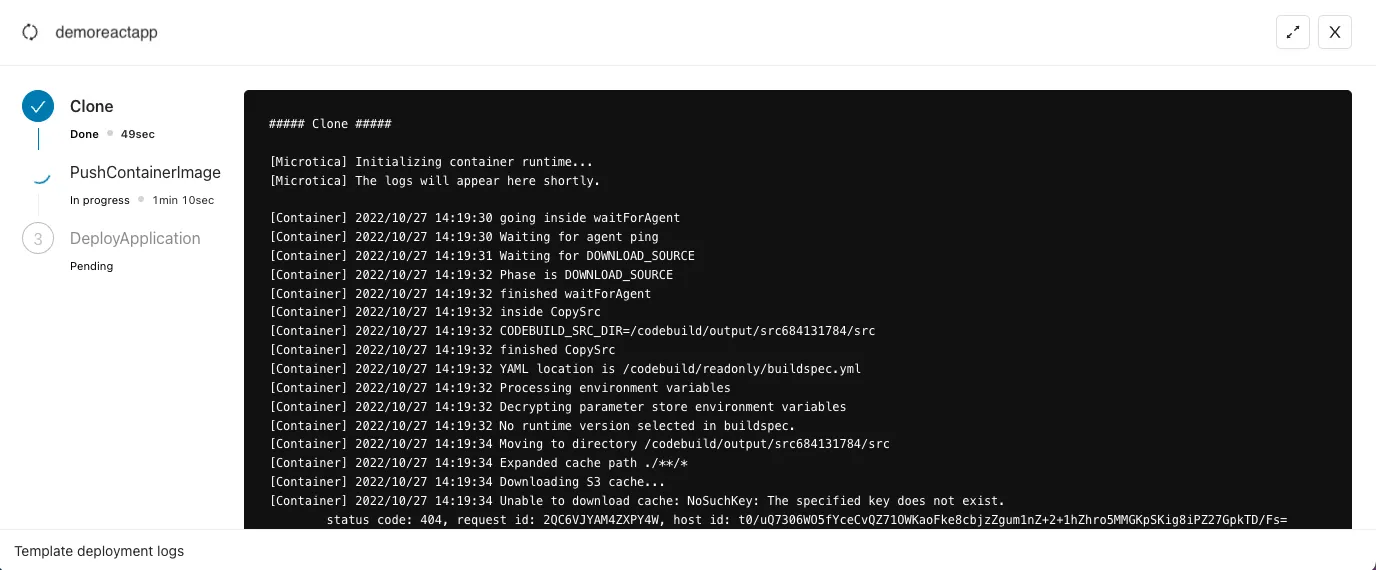
This process takes approximately 15-20 minutes. View real-time logs by clicking View deployment to track progress.
5. Access the application
When the deployment is finished, you will see a View Application button leading you to the app Overview tab.
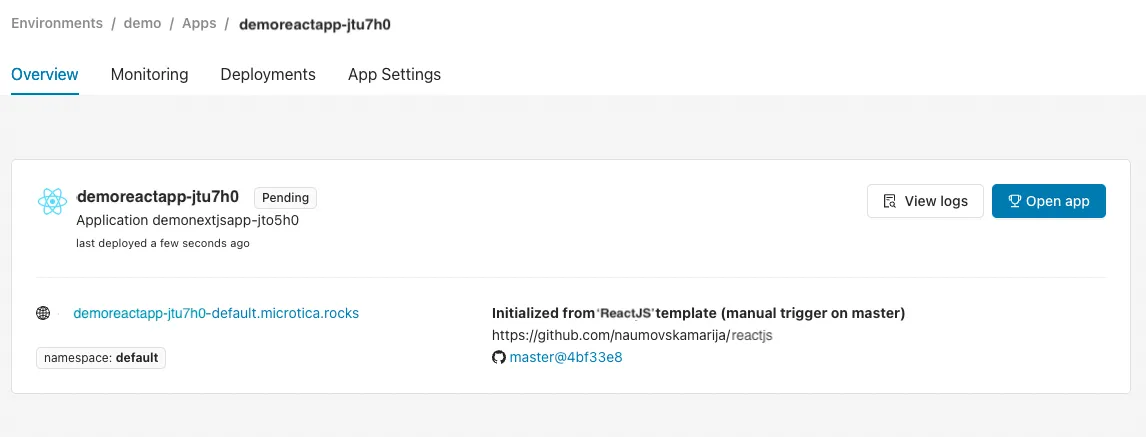
The Deployments and Monitoring tabs provide pipeline history, resource metrics, and instance logs for ongoing management.
Troubleshooting Common Issues
Even with a smooth process, issues can arise. Here’s how to resolve common problems when you deploy a React app to AWS with Kubernetes:
Routing Issues with React Router
Problem: 404 errors on refresh or nested routes.
Cause: Servers try to locate files by path instead of routing through index.html.
Solution: Configure Nginx to redirect all non-static requests to index.html:
nginx
CopyEdit
location / {
	try_files $uri /index.html;
   }
Also, make sure your Kubernetes ingress rules aren't overriding this behavior.
CORS Issues from Frontend to Backend APIs
Problem: Blocked API requests due to CORS restrictions.
Solution:
- Add appropriate Access-Control-Allow-Origin headers on the backend.
- Proxy APIs during development.
In production, route frontend and backend through the same domain or use internal DNS if services are within the same Kubernetes cluster.
Failed Deployments
Common causes:
- Incorrect Dockerfile or build context.
- Insufficient AWS permissions.
- Missing secrets or environment variables.
Solution:
- Use kubectl logs [pod-name] to diagnose errors.
- Check resource limits if containers crash.
Validate CI/CD pipeline configurations.
Best Practices After Deployment
Once your React app is deployed on AWS with Kubernetes:
Set Up Autoscaling Policies
Use Kubernetes Horizontal Pod Autoscaler to adjust resources automatically based on demand, maintaining performance efficiently.
Use Monitoring Tools
Monitoring system metrics and application logs helps detect issues early, improves stability, and guides scaling or infrastructure changes.
Add CI/CD Workflows for Ongoing Updates
Automate builds, tests, and deployments to reduce manual steps and maintain rapid, error-free updates.
Compress Static Assets
Optimise your assets by minifying code and compressing files to reduce load times, enhancing user experience.
Use a CDN Layer
Even after deploying on AWS, a CDN improves performance by caching assets closer to users, reducing latency and server load.
Conclusion
Learning how to deploy a React app to AWS involves more than just hosting files. Using Kubernetes provides powerful deployment strategies, scalability, and production-grade stability. From resolving routing and CORS issues to implementing autoscaling and CI/CD pipelines, each step helps maintain a reliable, efficient application.
As your React app grows, Kubernetes on AWS delivers the flexibility and control needed to manage complex deployments, seamless version rollouts, and performance tuning, supporting your long-term development goals.

Relevant Posts