How to Deploy Appwrite on AWS Using Microtica for a Scalable Backend For Free

Appwrite is an open-source backend server that helps developers build scalable and secure applications quickly. With Appwrite, developers can easily add authentication, file storage, and database capabilities to their applications, without having to write any backend code. In this article, we will guide you on how to deploy Appwrite on AWS using Microtica.
Microtica is a self-service cloud delivery platform that simplifies the deployment and management of applications on AWS. With Microtica, developers and DevOps engineers can easily set up infrastructure, CI/CD pipelines, deploy applications to AWS and manage their infrastructure with ease.
Why self-host Appwrite on AWS?
Deploying Appwrite on AWS, with Microtica’s template, provides several benefits, including:
Out-of-the-box container infrastructure based on Kubernetes, application load balancer, and persistent storage
- Provisioning on your AWS account for infrastructure and data ownership
- Autoscaling based on application load
- Automated git-push deployments and rollbacks
- Resource monitoring and performance insights in-app
- Cloud Cost Optimization
Prerequisites
- A Git account. Any provider from GitHub, BitBucket, GitLab, and CodeCommit is supported.
- Create a Microtica account by signing up with your email or Git account.
- You need to have an AWS account to be able to deploy apps to the cloud with Microtica. Here you can sign up for an AWS account.
Video guide on how to deploy Appwrite on AWS with Microtica
Quickstart to deploy a new Appwrite Backend Server
After creating a Microtica account, click the Deploy app button to land on the Templates page, where you can see a list of all production-ready templates.

This template creates the following infrastructure resources that will be provisioned on your AWS account:
- VPC, subnets and networking,
- EKS Cluster - Container infrastructure based on Kubernetes, application load balancer and persistent storage
1. Create a Git repository
After connecting your preferred Git account in Microtica, the platform will generate a repository on your Git account using the default repository name of `appwrite`.

2. Configure Template
Here you can customize the template for your needs by providing environment variables. Enter an application name and the database password that will be used as the MariaDB password. The same password will be used as a token for the Appwrite Executor.
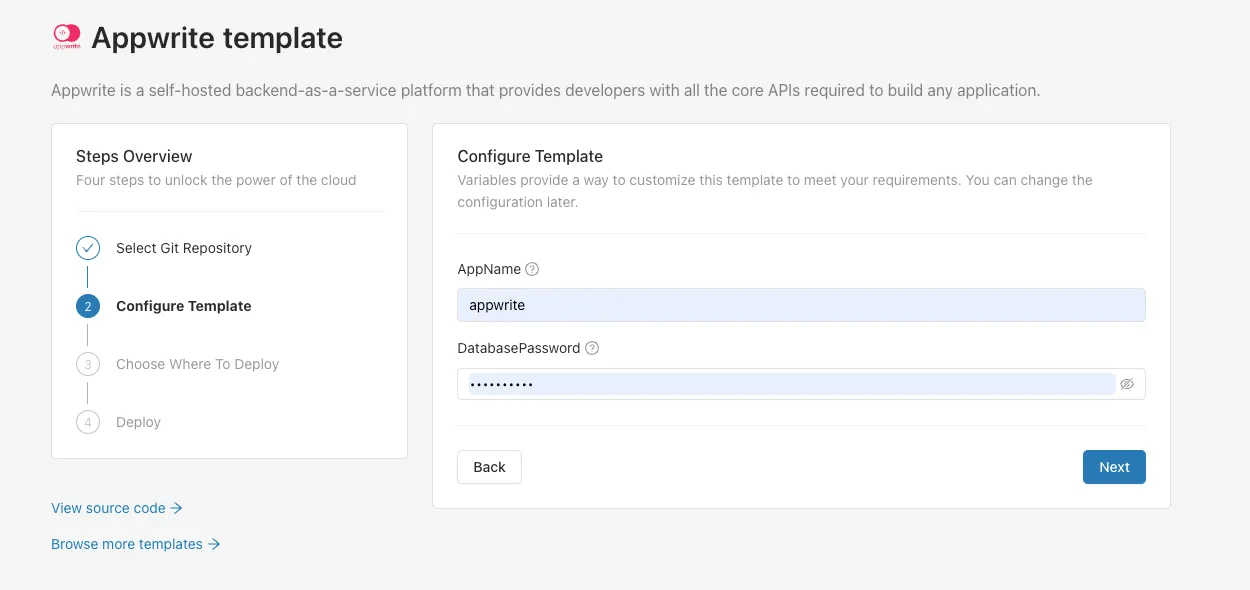
Environment variables can be updated/added/configured after deployment as well.
3. Deployment Destination
In the last step, you can choose the Kubernetes cluster where your Appwrite backend will deploy. Deploying on your AWS account means you need to create an AWS-managed Kubernetes (EKS) cluster, and you can start that process by clicking on the Create Amazon EKS Cluster button.
Here you can select the environment in which you want to deploy the template. An existing default environment called `development` will be available here, or you can create a new environment if you’d like.

After selecting an environment, you need to select an AWS account and region where the EKS cluster will be deployed. If you haven’t connected an AWS account yet, you can do it by clicking the Connect AWS Account button. This will initiate a CloudFormation stack that will give Microtica permissions to provision infrastructure on your AWS account.
Once you create the stack, the connection will be established automatically and you'll be able to see the AWS account in the dropdown list of accounts.
Select the account, select a region, and then click on Continue to move to the deployment of your environment.
4. Deploy the Appwrite Server template to AWS
Finally, a deployment summary of what will be provisioned on your AWS account is presented.
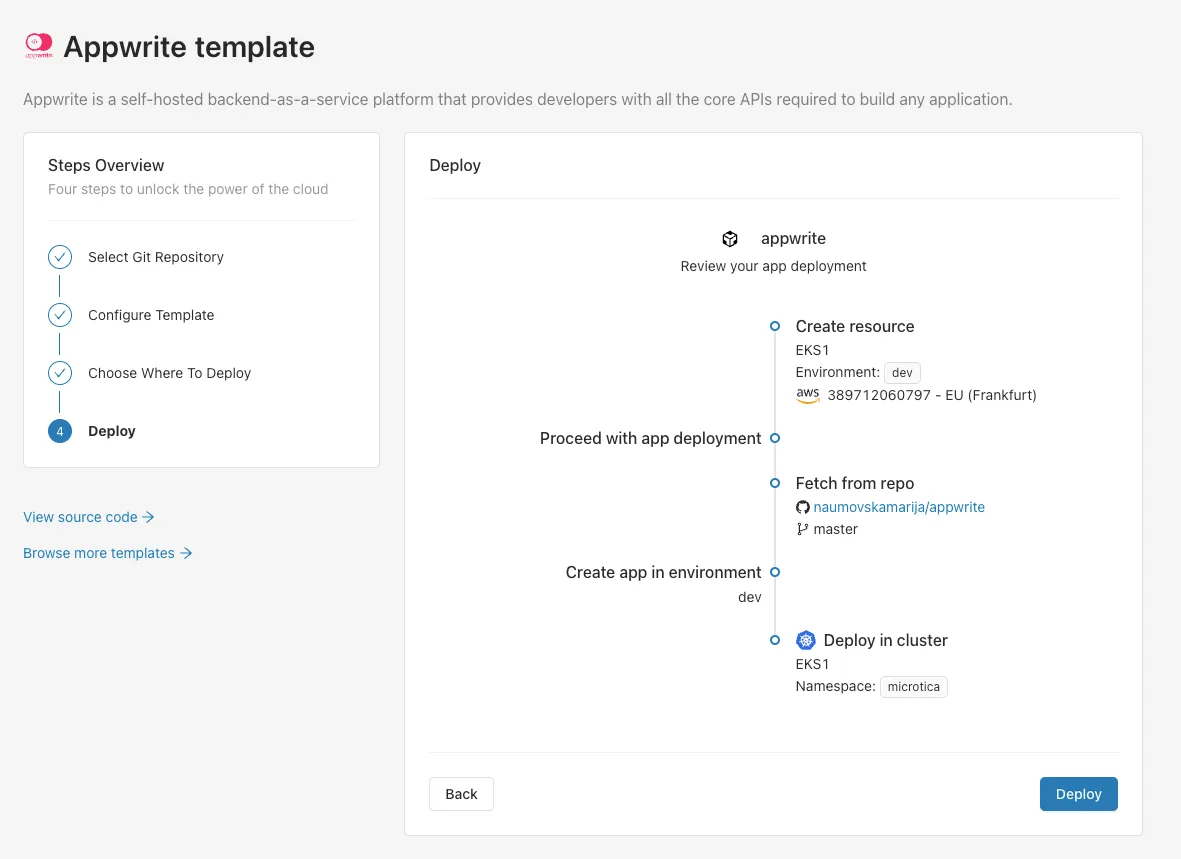
Clicking the Deploy button will trigger a deployment of the template and start creating the infrastructure (the EKS cluster) for an Appwrite Backend.
It will take around 15 min for the solution to be deployed on a new Kubernetes cluster. You can follow the build pipeline in real time by clicking the View Logs button.
Once the build process is complete, a new deployment with the infrastructure resources is triggered. You can follow the logs of the deployment process by clicking the View deployment button, and then selecting the deployment from the list.
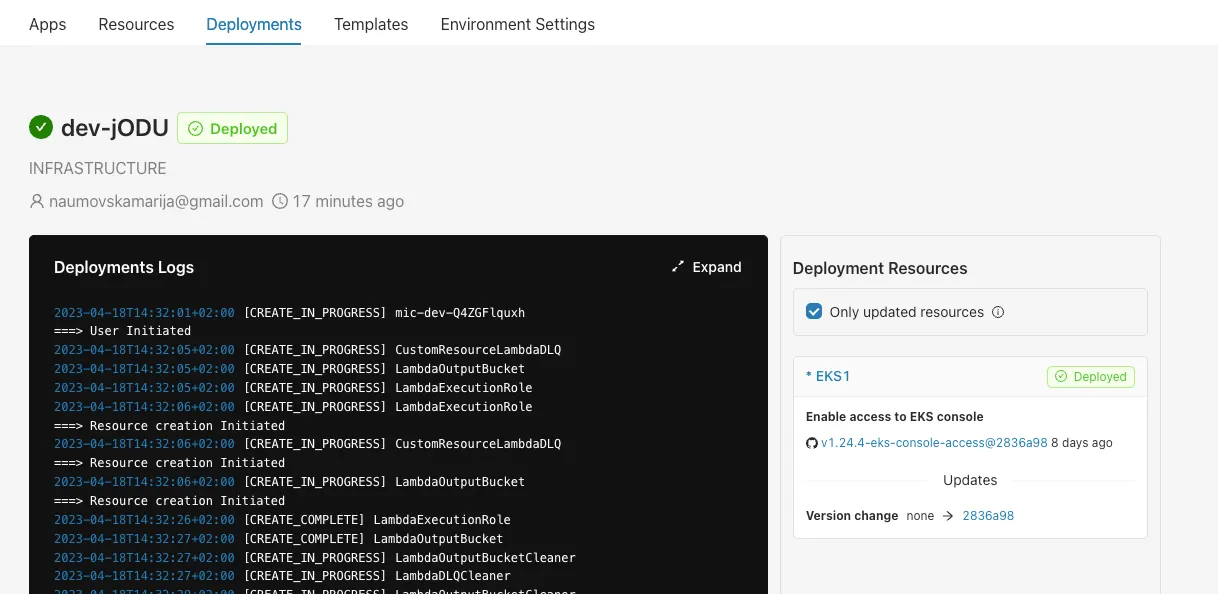
When the deployment of a new EKS cluster is finished, click the View logs button to follow the deployment process of the Appwrite application.
Access the Appwrite backend
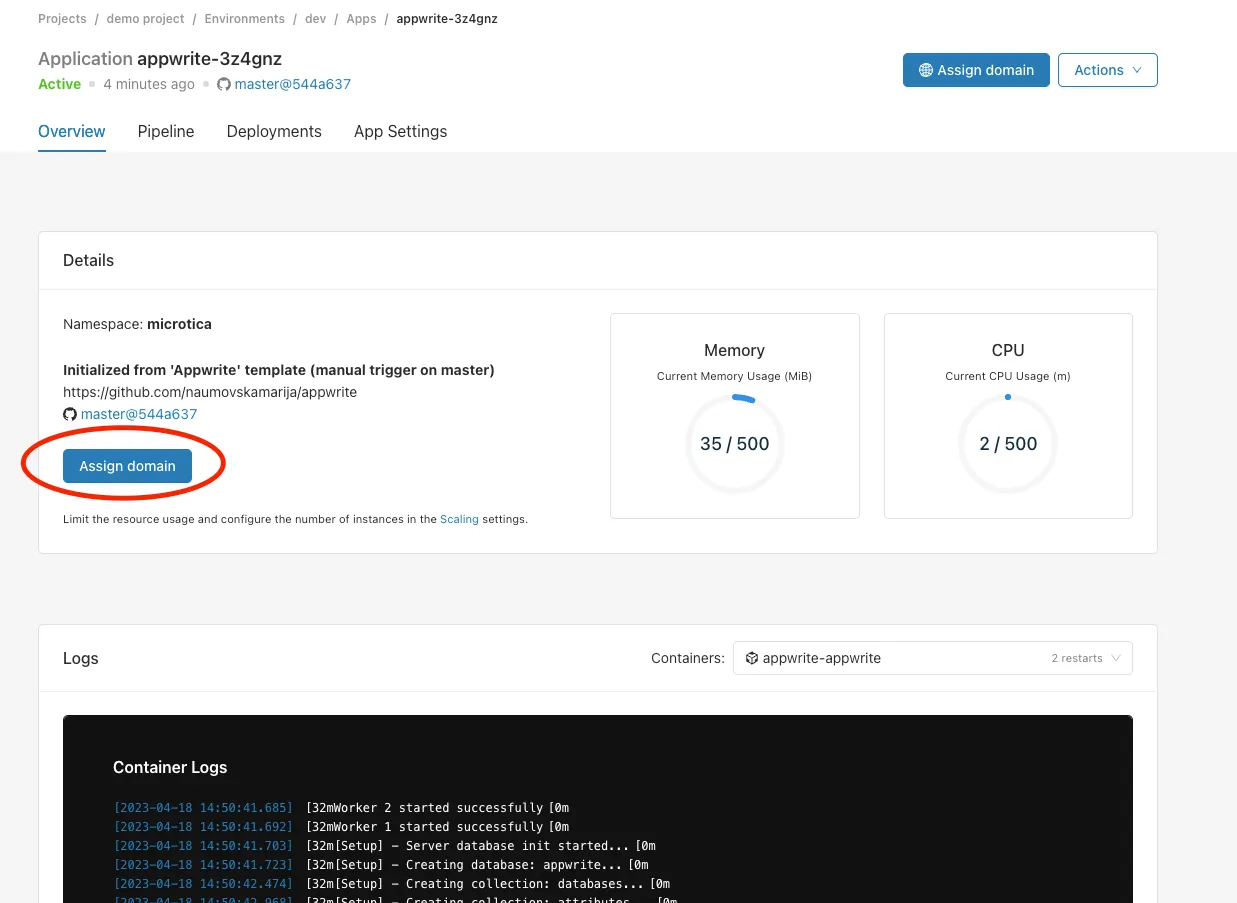
Once the deployment of the application is finished, click the View application button and you’ll be redirected to the app Overview page. Here you can Assign a domain to your application, to be able to access it later. You can use a Microtica-assigned domain which is free, or setup your own custom domain. Follow the steps to complete the exposure of your Appwrite backend on the Internet.
If you need more information you can find it in our documentation.
After the deployment for the domain changes to take effect is finished, click on Visit to preview the application. This is the server URL that you can use to access API endpoints.
Bonus: Cleanup
To remove all the resources created on your AWS account, navigate to your environment and click the Actions button on the right - Undeploy Resources.
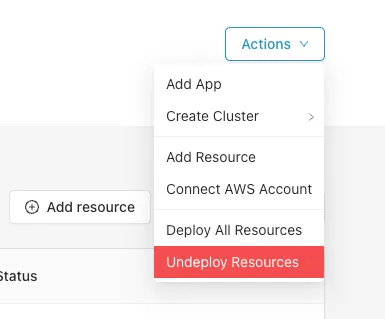
This will clean up the resources created in AWS, but you will still have the configuration in Microtica in case you want to deploy it in the cloud again.
Conclusion
Deploying Appwrite on AWS using Microtica provides a fast and efficient way to set up a production-ready backend without the overhead of manual configuration. With built-in templates, automated infrastructure provisioning, and Git-based CI/CD, developers can launch scalable, secure applications in just a few steps. The combination of Appwrite’s backend features and Microtica’s cloud automation capabilities makes this approach ideal for teams looking to save time while keeping full control over their infrastructure. Once deployed, managing your Appwrite server, from assigning domains to monitoring performance, is just as straightforward.

Relevant Posts